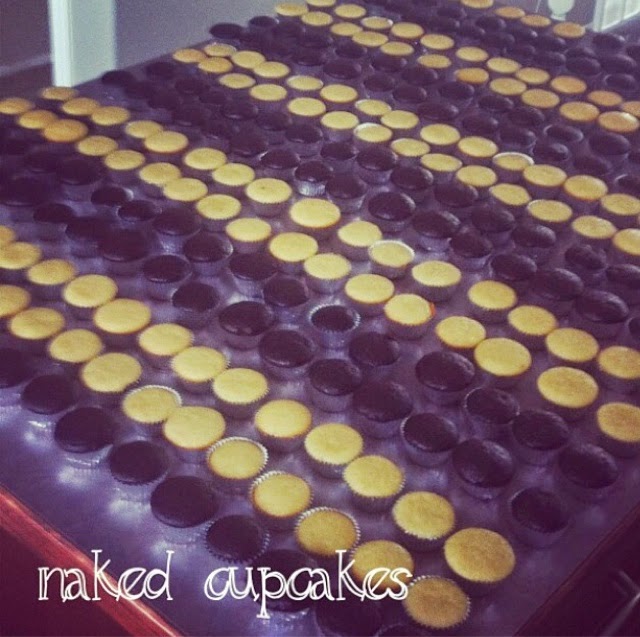
Tuesday, October 7, 2014

Cow Pies!


I'm involved in the leadership of my church youth group. (Should you like to learn more about my church -The Church of Jesus Christ of Latter-Day Saints- click here).

There is a really old church movie called Johnny Lingo. Now I believe they remade it, but the old one is classic. We watched it this evening as Young Women. Then the girls had tasks to achieve to help them maintain their "8 Cow" status. (These girls are already worth that and more! I just love them!)

I was in charge of the activity and had 8 tasks all ready for them to do with other leaders assisting with them. I was in charge of the cow pies.

Now before you get nervous, it had nothing to do with real cow pies... Well except they did start off brown since I used chocolate cupcakes. ; ) 

I just used a boxed mix and store bought icing (fluffy white & chocolate; the chocolate was tinted with black icing coloring).

But here is a quick photo step by step tutorial of how these  "cow pies" turned into cute little cows. 

Items needed:

Cupcakes
Icing (white and black)
Marshmallows (sliced thin)
Pink chocolate wafers
Chocolate covered raisins
'Eye' sprinkles (or just use black icing)

Here we go!
 (We can have lots of fun! - 10 points to whoever gets that reference.... I just couldn't help singing it while decorating.)

Just frost some white icing onto a cupcake. It doesn't have to be perfect!


I cut marshmallows into thin slices to use as the cow muzzle. I put the sticky side down. 


Did you know there are cute little eye sprinkles?? Well there are! Add 2!


A couple chocolate covered raisins make some pretty fantastic little ears.


A pink chocolate wafer attached with a little pipes icing to the marshmallow makes the nose.


Pipe some black icing (I use chocolate then add black icing gel coloring) to get spots and nostrils. And voila! Cutest little cow ever!

Kinda hoping someone wants a farm themed kids party at some point so I can try out some more animals, and a barn! So friends.... Anyone???? 

: )


Thursday, September 25, 2014

S'mores Pie


So, want to make the most decadent chocolate pie ever?!?!? 

Then make this S'mores pie! It was so rich and delicious. The recipe says it feeds 6-8 but I would actually go with 10-12 due to how rich it is and the sweet sugary goodness of the marshmallows on top!

The recipe comes from The Pastry Affair. It was incredibly easy to make, and I even managed to not start a fire in my oven while toasting the mashmallows!

Ingredients

2 Cups Graham cracker crumbs
8 TBsp unsalted butter, melted

3/4 Cups heavy cream
3/4 Cups milk
10 ounces semi-sweet chocolate, chopped
Pinch of salt
2 eggs, whisked

1 bag of large marshmallows

Preheat the oven to 325 degrees. Make the crust by mixing together the graham crackers and the melted butter. Press into a 9 inch pie pan. Bake for 8-10 minutes.

In a medium saucepan heat the cream and milk. Whisk it lots to keep it from burning and keep the heat at a medium temperature. Once it is heated through add the chocolate and pinch of salt. Whisk until smooth. Slowly add the whisked eggs and it will thicken. Pour onto the crust and bake for 15-20 minutes, or until the chocolate filling does not move when shaken slightly. Remove from oven. 

Cut the marshmallows in half and place on top of pie. With broiler on low and oven rack low, place pie back in oven till marshmallows are a toasted brown. It will not take long so keep an eye on it!

Allow the pie to set for 2-3 hours in fridge after it cools. 

Then indulge! 

: )

Thursday, September 18, 2014

Ooey Gooey

I love Pinterest. It's not a secret. I love how so much stuff is already found for me. It saves me hours on google. Especially when I'm searching for some sweets for Girls Night! So that is where I found this amazing ooey gooey peanut buttery chocolate goodness.


This recipe comes from I Wash ... You Dry

Here is the recipe for this delicious Chocolate Peanut Butter Earthquake Cake.

Ingredients:

1 box chocolate fudge cake mix, plus ingredients needed to prepare (eggs, oil, water)
1/2 C. butter
8 Oz. cream cheese, softened
1/2 C. creamy peanut butter
1/2 tsp. vanilla extract
3 1/2 to 4 C. powdered sugar
1/2 C. chocolate chips ( I totally added more than this! The more chocolate the better in my humble opinion.)
1 C. miniture peanut butter cups (Again, I used more..... This cake is not for those on a diet!)
2 C. Reese's Pieces (not on original recipe.. this was all me!)

To make the cake!

1. Oven needs to be preheated to 350.
2. Make the chocolate cake mix according to the package and pour into your cake pan. Make sure it is lightly greased. I made my cake in 2, 9 inch rounds. However, do not put it in the over quite yet! You're about to add the ooey gooey goodness!
3. Melt your butter on the stove until it is bubbly. 
4. Combine butter and cream cheese in a mixing bowl and beat until it is smooth.
5. Add the vanilla and peanut butter and continue to beat until smooth.
6. Add your powdered sugar 1 C. at a time and continue to beat mixture until it becomes light and fluffy. 
7. Scoop big spoonfuls of your peanut butter mixture and drop them into the cake batter. Sprinkle that with chocolate chips, 3/4 of the peanut butter cups, and 1C. of the reese's pieces. 
8. Bake for 45-55 minutes. The center will still be slightly jiggly when the cake is done (again where the ooey gooey goodness comes from!)
9. Let the cake cook for 15-20 minutes. Do not remove from pan! (I learned this the hard way and only got to enjoy one of these suckers....)
10. Top with the peanut butter cups and reeses pieces that are left over! Slice and serve! 

It was so delicious and decadent. Highly, highly recommended!


It was a girls night hit!

: )

Wednesday, September 17, 2014

Wedding Cupcakes Post #1


So I'm not going to go into a lot of detail on these cupcakes. But I will say the chocolate ones were intense! Very brownie like in taste and incredibly dense and rich. Yum! I used 2 different piping techniques for the chocolate and vanilla cupcakes. The ones getting the vanilla icing were piped to look like roses. To get this effect you start your piping in the inside and work your way out. Whereas the chocolate ones, I started on the outside and went in to give them cute swirls. Add a mini Hershey kiss and they are just too cute!


Coming soon!


Stay posted this week for more info on this lovely spread I did in August. 

: )

Oops!

So I just realized that this 'little' cake never got published!

My dear friend Jill got married in June of 2013. We met my first year at college and were in the same YSA ward at church. 12 years (?) later we both are living in Lethbridge and she meets the man of her dreams. 

She asked for 300 mini cupcakes in her wedding colours of pink and green. They filled my entire island! A little army of cupcakes. 


And decorated...


And then the cake! I say 'little' because it really wasn't! The bottom tier was a 14" cake! Now, we happened to be having a very hot day the day of delivery! It was terrifying! The cake had a bit of an accident on the way there! Thankfully I was able to fix it. The cake was vanilla with vanilla buttercream and covered in a crusting buttercream. I really so like crusting buttercream because it looks nice and smooth like fondant but I find it easier to work with! Now if someone loves fondant I'll use it, or if I can't do what is requested with icing! Thankfully this couple didn't care for fondant. : )

The wedding was beautiful and they had the cutest little setup for the cake!


Now, please do not judge the ribbon looking a little wavy... Like I said it was hot, so a little melting occurred as it sat there. I was very happy with it though and hope they loved it just as much as I did. 

So congratulations Jill & David! And since I'm so late getting this up... Happy 15 month anniversary!


: )


Tuesday, September 16, 2014

Another wedding cake... From June....

Here it is! I made a wedding cake in June for a lovely couple. She's a Brit. He's not. Ha ha!

        It was nice to be able to get back into cake decorating! I'm running out of single friends though, guess I need to start doing birthdays!


        The cake was lemon with vanilla buttercream and lots of piping! That was fun. It is definitely not something I felt too secure doing but I have to say, I was quite proud of it! Especially since I don't do a lot of it. A new technique to try and perfect now. 


    So there you have it!

    Congratulations Charlotte & Tyrel!

                     : )

Monday, June 16, 2014

It's been awhile.... But I have been baking!


 This entry is basically going to be photos. I have been horrible getting on here lately to document things but I'm hoping to do more baking soon and try and get back on track. The whole point of me blogging was so I could eventually print it into a book of all my creations, so I need to get all my creations in here! 
I kind of went overboard baking cookies awhile back. I just really needed cookies. Chocolate chip, Cadbury MiniEgg, Mint Chocolate, and Reese Peanut Butter Cup! Delish!
Add some chocolate ice cream between a couple of them and even more delish! 

: )


Tuesday, August 13, 2013

No bake Oreo cheesecake bites

I made these for a Relief Society function at church in July. We were supposed to be having a Garden Party and then 1/2 hour before the activity, west Lethbridge experienced a Micro burst. Can I just say how crazy that was? It's pretty fantastic when you have your mixer going and can't hear it due to the rain being so loud! Needless to say the Garden Party was moved inside.

I am all over desserts that look like you put a ton of effort into them, when in reality they were the easiest thing ever. Presentation is everything. So I present to you, No Bake Oreo Cheesecake Bites, brought to you in part from Cooking Classy.


Also loving all the picture editing apps on my phone... makes everything so much cuter!
 
 
Ingredients
  • 33 Oreos, divided
  • 4 oz. cream cheese, softened
  • 1/4 cup powdered sugar
  • 1/2 tsp vanilla extract
  • 1 cup heavy cream
  • 3/4 cup milk
  • 1 (3.4 oz) pkg cheesecake flavored instant pudding mix (I used vanilla as living in Canada I don't have access to what I can only believe to be a magnificent creation.. cheesecake flavored pudding..Mmmmmmm. Guess I know what I'm buying next time I go to the States!) 
  • 30 mini Oreos
In a mixing bowl, using an electric hand mixer, whip together cream cheese, powdered sugar and vanilla until smooth. Then use a wire whisk, stir in cream, milk and instant pudding (I actually have a whisk on my hand mixer so I used that). Whisk mixture for about 2 - 3 minutes until it is quite thick.  Freeze mixture for 5 minutes (I found that I had to freeze it a little longer than 5 minutes). While your filling is in the freezer, crush 3 oreos so they are nice and fine. I used my food processor but a rolling pin and Ziploc bag will apparently work as well according to the Cooking Classy site. Stir crushed Oreos into cheesecake mixture. Pipe cheesecake mixture over 30 large Oreos (depending on the tip will give you a different look. I like how mine turned out looking like soft serve ice cream), then top each one with a mini Oreo. For best result serve immediately (store in refrigerator if not used immediately).
 
And try not to eat all of them yourself!
 
: )


Monday, August 12, 2013

Chocolate Peppermint Cake

I was looking through pictures of stuff I've done, and came across this beauty. I had made a chocolate peppermint cake last Christmas for a Christmas party that I was in charge of organizing. It was so good I made it again. And made it cuter the second time. Here it is. I want a piece of that right now. A very small piece. It was one of the richest cakes I have ever eaten. But oh so good!

 
Sadly, I don't remember the exact recipe. If I ever do track down what I used, I will be sure to post it!
 
Until then just take in that waterfall of chocolate ganache.
 
: )

Nutella PB cookies

I love Pinterest mainly because it leads me to little gems like these. Nutella PB cookies. Yum. The recipe comes from The Sisters Café.


I'm picky when it comes to cookies. I like them to be soft and chewy. I am not a hard cookie fan. So these are absolutely perfect!
 
Here is the recipe;
 
1 Cup butter (room temperature)
2/3 Cup peanut butter (can use smooth or crunchy, I used smooth because it is all I had on hand, but I'm curious to try them with crunchy!)
1 Cup sugar
1 Cup brown sugar
2 eggs
2 tsp. vanilla (I used Watkins double strength.. and still put in the 2 tsp. love vanilla!)
2 2/3 Cup flour
2 tsp. baking soda
1 tsp. salt
heaping 1/3 Cup Nutella (I just added Nutella till I felt I had enough in the batter)
 
Cream together the first 6 items on the list until they are smooth. Add dry ingredients and mix until well blended. Add the Nutella in big spoon fulls into the dough and use a knife to swirl the nutella throughout. Do not over mix. Chill the dough for 15 minutes to allow the Nutella to harden. Spoon onto cookie sheet (I used a 1 1/2 inch cookie scoop). Bake at 350 for 8-10 minutes. Let cool a few minutes on the cookie sheet before transferring to wire racks.
 
Then pour yourself a huge glass of milk and indulge!
 
: )

Monday, July 15, 2013

Pineapple Flowers... Take 1

I found this fantastic tutorial on Annie's Eats. I love this lady! She has so many fantastic recipes. I was asked to make 6 dozen cupcakes for a bridal shower. The wedding colors were red and yellow, so I was asked to incorporate those into the cupcakes. I went with 3 different flavors, cuz you know me, simple??? What is that word? So here is the first one.

I had been wanting to try Pineapple flowers for awhile, and this gave me the perfect opportunity!

This became.....
 
THIS!

 
So, it isn't as pretty as the one on the tutorial, but I figured it wasn't too shabby for a first attempt! One thing I did discover though is that cutting pineapple really thin, is really hard. I had to turn up the heat (hence the brown edges) and leave them in the oven far longer than what the tutorial recommended.

They still turned out cute though, so I'm happy with it! And they were a hit! The cupcakes themselves were vanilla with a pineapple buttercream. Yum!

Well, I am happy to be back and blogging. In non-related baking news, I bought a house, with more counter space. I guess that does make it baking related, as it will give me more room to bake! I am incredibly excited for it! I will try to update more frequently. I do have a backlog of things to blog about that I haven't done. Oops.

To those who actually still care about my little blog.... thank you.

: )

Friday, September 21, 2012

#9! I think....

It has only taken 4 months, but here it is. Again, sorry for the bad picture quality. I really need to remember to bring more than my phone.  Maybe I can attempt to steal some from the bride! I'll have to investigate and see what I can come up with!

This cake was a stressful affair. Are you excited for the story?? I know you are.

The only actual cake was the bottom tier of this cake, as there were going to be other desserts at the wedding for the guests, and the cake was basically there for the customary "cutting". It was a key lime cake with cream cheese frosting, covered in green fondant. The top 2 tiers are Styrofoam, also covered in fondant. The green progressively gets lighter as it goes up. It's hard to tell in the above photos due to lighting. It is a really subtle difference. Here is a picture of the cake prior to being displayed. It was level. I swear. I really need to work on my photography skills. Or maybe just take a picture with a level on top to prove it!


Making of the cake occurred the night before the wedding, as did the covering with fondant. I made marshmallow fondant as opposed to using store bought. I'm not sure if this was my downfall, or if it was just late, but covering the Styrofoam was a nightmare. By 2am I had basically decided I would send the bride a text message (on her wedding night btw, since her reception was the next day) and let her know there would be no cake. I decided that I would give it one more try and by 3 am, I had a covered cake. Then I promptly went to bed, covered in icing sugar.

The reception was in Calgary, so I had to transport. Some friends and I were invited to the family dinner so we had to be there early. We got up there and thankfully the cake remained intact. There were a couple of tiny issues, that I was able to fix, and of course hide with the beautiful lace.

The cake turned out! YAY! And the bride loved it! Double YAY!

And now, the stress. The mother of the bride passed away unexpectedly in February, and so we were using some flowers that had been on her wedding cake which she had saved for over 20 years. These things were fragile. And guarded under lock and key by the father of the bride. Understandable. I felt horrible taking the box from him. I carefully found a few flowers that were intact enough, and didn't include some lovely pink tulle, and arranged them on the cake.

During the family dinner, I was positioned in a way that I had direct eye line of the cake the whole time. The photographer came in, picked it up and walked out with it. My heart almost stopped. Not so much for the cake, but for those flowers! Oh my. What if something happened to those flowers.

The cake came back after having its photo session. And it came back intact. Sigh of relief. Roughly 10 minutes later however, I notice some guys looking at the cake and laughing a bit. Then they get up and start moving it. What is going on? More people come over, look at the back of the cake, and laugh. A woman goes and talks to the bride. She goes pale. Then seems ok. The bride goes and looks at the cake. Now keep in mind this all happening during speeches, etc. So I remain seating. Again, heart stopping. Finally the dinner is over. A friend goes on a mission to find out about the cake because I may die.

A small child had decided to put their hand through it. That's right. Ripped fondant and cake. I could have died! We hadn't even made it to the reception yet! The flowers however were not harmed, so a sigh of relief was had. But seriously, after my breakdown making the cake, this hit me hard. I had to go have a cry in my car. I get emotional over cake. Deal with it.

All in all, everything was good. The bride and groom were happy and they enjoyed it. That's all that matters right? None of the drama matters. If nothing else, it provides for a good story!

Congratulations Frances and Eric

Saturday, September 15, 2012

Summer heat

This summer had been way too hot to bake. No air conditioning equals death in the kitchen.

Never fear, fall is here and I'm back!!!!

Stay tuned....

Thursday, June 7, 2012

Bums & Panties

Aren't these so cute? I'm probably biased but I am so happy with how they turned out. This is also only small sampling of the different designs I came up with. Using a heart cookie cutter I was able to make the perfect little 'bums', and then using royal icing I went to work!

And in case you are wondering, I don't just sit around making panty cookies. Yay for bachelorette parties though, that allow me the opportunity!

Tuesday, May 22, 2012

Ombre Wedding Cake

The first wedding cake of the season was an 'ombre' wedding cake. The cake itself was a vanilla butter cake, with french vanilla butter cream frosting. The frosting was my fabulous crusting butter cream, so the top of the cake is actually just really smooth icing. The stripes were made from marshmallow fondant that was dyed pink, and then as I went up the cake I added more white fondant to the pink to lighten it. It turned out pretty cute, if I do say so myself. 

Sorry for the kinda crappy pictures. I forgot my camera and only had my phone. I'm hoping the bride and groom got a good picture of it and will be able to send me a copy.


Tutorial for how to do the ombre effect.

The recipe for marshmallow fondant is super easy, and I was quite proud of myself for making it. It tastes so much better than that crappy Wilton stuff.. .sorry Wilton.

Marshmallow fondant found here, or just read below

All you need is:
  1. Marshmallows - they can be big marshmallows or mini ones
  2. Icing sugar - You'll be mixing the icing sugar into the marshmallows to make a dough, have an entire bag on hand, but I didn't use the whole bag
  3. Food colouring
  4. Flavoring oil - This is optional. If you don't add this your fondant will be sweet and flavorless which works well if your got all the flavors your want in your cake already
Step One:
Take a couple of handfuls of marshmallows and put them in a microwave safe bowl. Add a couple of drops of water and toss the marshmallows in it until they are all a bit damp. If you are going to just make one colour then put the whole bag of marshmallows in the bowl and add a couple of teaspoons of water. If you're going to put flavoring oil in, add it now and add less water
If you want to make a bunch of colors, melt the marshmallows in batches as it is easier to add color to the melted marshmallow than to actually add the color to the dough.
Step Two:
Stick the marshmallows in the microwave for ten seconds at a time until the are puffed up and easily stir into a goo with a wooden spoon. Tip: Grease your spoon with butter, things can get a bit sticky. (Even with the butter I still found it quite sticky)
Step Three:
Add food colouring  to the melted marshmallows until you get the colour you want. The icing sugar with dull the color a little, so make it brighter than you would actually like it to be.
Step Four:
Start folding icing sugar into the marshmallow goo until it becomes a soft and fluffy dough. Grease your hands with a bit of butter and turn the marshmallow out onto a table sprinkled with icing sugar. Continue to knead in icing sugar until the fondant is stiff enough to roll out.
If you add too little icing sugar the fondant will be very sticky- Just add more icing sugar
If you add too much icing sugar the fondant will be very stiff and hard to roll out - knead in a little bit of butter. (I used shortening)

And there you have it. Super easy to follow instructions on how to make fondant that actually tastes good and doesn't get solid as a rock. Thank you again Pinterest. You led me to the wonderful link (I have at the top of the instructions) and then allowed me to learn something new!

Doughnut Cupcakes (Muffins.... toe-MAE-toe, toe-MA-toe)

Hello. My name is Tiffany, and I am addicted to Pinterest. Yep. I had told myself I wouldn't cave, but I did. You can follow me here. Hee hee. Shameful plug.

I found this recipe for 'Glazed Doughnut Muffins'. I say cupcakes. They are more muffin tasting, but I feel the sweetness of the glaze makes them a cupcake.


Recipe:

Ingredients for Muffins (Cupcakes)

1/4 C. butter
1/4 C. vegetable oil
1/2 C. granulated sugar
1/3 C. brown sugar
2 large eggs
1 1/2 tsp. baking powder
1/4 tsp. baking soda
3/4 tsp. ground nutmeg
1 tsp. cinnamon
3/4 tsp. salt
1 tsp. vanilla extract
2 2/4 C. all purpose flour
1 C. milk

Ingredients for Glaze 

3 Tbsp. butter, melted
1 C. icing sugar
3/4 tsp. vanilla
2 Tbsp. hot water


Directions:

1. Preheat oven to 425 degrees F. Line 12 muffin cups or spray with non stick cooking spray.
2. In the bowl of a mixer, fitted with paddle attachment, beat butter, oil, and sugars until smooth. Add eggs one at a time. With mixer on low add the baking powder, baking soda, nutmeg, cinnamon, salt, and vanilla extract until just combined.
3. Add the flour alternately with the milk, beginning and ending with flour until everything is combined.
5. Spoon batter into cups and smooth tops. Divide equally among the tin. Bake for 15-17 minutes* until they are a pale golden brown and springy to touch. Rotate the pan half way through baking. Cool for 5 minutes in tin, then 10 minutes on a wire rack.
6. To make glaze mix together ingredients and whisk until smooth.
7. When cupcakes have cooled slightly, dip the top in the glaze. Allow the glaze to harden and dip again.

*I only put mine in for 15 minutes and the bottoms were a tiny bit burnt, so make sure you are watching them!

I feel these would be perfect with a nice warm glass of hot chocolate, and with the rainy days ahead of me, I guess I now have some yummy treats to keep me warm!

Happy Baking!

Tuesday, May 8, 2012

Wedding season!

Wedding season is upon us! I have one done, 2 more to go (and who knows, maybe that number will increase!)

I'll try to get the first wedding up over the next week. Life's been a little hectic lately!

Tuesday, March 20, 2012

I love MiniEggs


And now so do you. Especially on cake. Chocolate cake. With chocolate Icing.


Monday, March 19, 2012

Mini Fruit Tarts

This weekend I attended a 'High Noon' Tea. It was a function put on through church that my fantastic roomie was in charge of. She had mentioned to me that she didn't think she was going to do a dessert, and me, being me thought that would never do. So what goes better with our British tea, than fruit tarts.

Can you spot the 'hidden Mickey'.... Hello. My name is Tiffany, and I am a Disneyland addict.

I found this recipe on the Kraft website.
Super easy.
Super quick.
Super tasty.


Ingredients:

18 frozen mini tart shells
1 pkg. (4 serving size) Jell-O vanilla pudding mix
1 C. cold skim milk
3/4 C. thawed Cool Whip Light Whipped Topping
Fresh fruit

Directions:

1. Bake the tart shells according to the package and then allow to cool.
2. Beat the pudding and milk with a whisk (or an electric mixer) for 2 minutes or until combined and slightly thickened. 
3. Stir in Cool Whip.
4. Fill the tart shells (I piped mine in, just because I thought it would look nicer than being spooned in)
5. Top with fresh fruit.

Seriously so easy.
Plus I made this pretty amazing hat. What is the good in pretending to be British if you can't wear a big hat with a sparkly purple bird on it??