Wednesday, December 21, 2011

The dream... realized, sort of.

I did it. I finally lived the dream. Well, sort of. I made a Christmas dessert table for my ward Christmas party this year. It's not the prettiest, and there are a ton of things that I would have changed now that I've done it (like having a backdrop that actually is long enough to not have a gap above the table), but I did it. And everyone loved it. That's the important part right? The picture quality isn't the best because all I had was my phone, but I did have some fun using instagram to make them a little cuter!

The whole thing! Please ignore the fact that the hot chocolate rice krispies are sitting in ziplocs... I didn't want them to dry out prior to being served.

And here is what was on it, minus a close up of the cranberry chocolate cookies, and the hot chocolate rice krispies. The cookies were made from my favorite chocolate chip cookie recipe, found here. All I did was add craisins and Christmas M&Ms instead of chocolate chips. And you can find the rice krispie recipe here. Which reminds me, I promised my room mate who was unable to attend her very own batch. I should get those made before Christmas.
If you are a fan of egg nog, you NEED to make these. Trust me. Life changing experience. I didn't actually expect them to be as popular as they were as most people I know do not like egg nog. However, there were none of these babies left! I even had a friend tell me she had dreams about them after. : ) And as always, I owe my crazy searching through what pictures look good on google to finding them! Get the recipe here and go make them. Right now. Do it. I'll wait. And yes. I did leave out the alcohol. : )
I have many friends who have discovered Pinterest recently. And so I had to check it out. I have yet to join, and doubt that I will, but because of it, I found these adorable cookies! Seriously, could they be any cuter? The trickiest part with these was getting the antlers to stay up! My Mom helped me out and she and I were racing against time as we quickly tried to assemble them before they were too cooled down! If you want to make these, go here... The peanut butter cookie held it's shape really well. You could probably use your favorite cookie recipe, but again, the shape of the cookie makes all the difference!
White Hot Chocolate anyone? Funny story. Almost burnt down my parents brand new home making these. Broilers and marshmallows. Fun. So my tip for these... WATCH them. Even though I was we still had some pretty big flames in the oven. Nothing like a small oven fire to wake you up on a Saturday morning! This is one of the super easy recipes as it just requires doctoring a box mix. Good ol' Betty Crocker. You can find the recipe on the Betty Crocker website.
Who doesn't love Chocolate? Who doesn't love peppermint? Put them together and voila! I cheated here too. I used a chocolate fudge box mix, but the icing was homemade. And sweet! I didn't use as much powdered sugar as the recipe called for. As well, I would probably reduce the peppermint I added. They were potent! However, I love the smell of peppermint and the taste, so it wasn't bad for me! And could those candy cane sprinkles (peppermint flavored!) be any cuter? Icing recipe is located here.
What is Christmas without some gingerbread? Now, I'm not the biggest fan of gingerbread but it is classic Christmas. And in cupcake form, it had to be done. Again, super easy. Using a spice cake box mix and doctoring it a little. Add some brown sugar icing, cute gingerbread men sprinkles, and voila! I used candy cups as the liners for these and one of my favorite moments of the night was watching a friend stab it with a fork trying to get into it. I will say they are tricky to get into. I recommend having a pair of scissors handy!
Cranberries. I love cranberries. So tarts it is! Martha Stewart came through on these babies. Again, I cheated a little using ready made tenderflake crusts instead of making my own. These were also a crowd pleaser. Absolutely none remained. Had a few people mention that they were their favorite thing from the table. If you want to give them a try, go on over to the Martha Stewart website.
Let me tell you a sad story. I went to Oregon to visit my Aunt. I was on a mission to find peppermint sticks. And we did. Cute little ones that are a soft peppermint so they melt better in your mouth than a regular candy cane. I purchased roughly 75 of these little guys. Packaged them carefully in my suitcase using bubble wrap and soft items. I arrive home. I open my suitcase. TSA went through my bag. I only have 40 left intact. Sad. But I wanted to do them still anyway, so I did! Easiest thing ever. Melt some chocolate. Dip. Allow to sit for 30 seconds or until chocolate starts to set. Sprinkle with cute snowflake or holly sprinkles. (well any Christmas sprinkle will do) Done.
Remember how I said gingerbread isn't my favorite? I think I was reminded as to why. They are a pain to make. Maybe I just haven't found the right recipe. Which is why I'm not sharing this one with you. If anyone has a hassle free gingerbread cookie recipe that doesn't make rock hard cookies... Please share! This recipe did make a softer gingerbread, which I prefer if I'm going to make them, but way to much work. It was kind of funny watching my Dad roll out dough and carefully cut each snowflake. I sure do love my parents and the help they provided!
And last... another Pinterest find. Two things I'd change. I'd cook them for less time, and I wouldn't move them to the cooling racks as quickly. As you can see, it caused the kisses to get a little deformed. But these were super easy and super cute. Find them here.

So there you have it my first official dessert table. If you need one for anything let me know! I'm more than willing to practice my skills!

Merry Christmas!

November birthdays

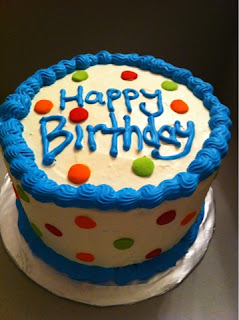
So not that exciting of a post but there were 2 birthday cakes made for extended family this month, so I figured I would show them off. Really simple and to the point cakes!

Yep. That's all!


Cake for Grandma!
 

Cake for Uncle Fred.


Monday, October 31, 2011

Happy Halloween!

I LOVE Halloween!  It is seriously the most wonderful time of the year (next to Christmas of course!) I love the idea of being something you're not for a day. And free candy is always a plus. I love cute little kids in their cute little costumes (I'm not the biggest fan of the gory costumes, but the ones dressed up like little furry animals, princesses, & even little cowboys are adorable!)

Another fantastic thing about Halloween, is that it gives you the opportunity to take these.....

And turn them into this!


So many mummys!


And then, change it up a little with a different color, tootsie roll & green jelly bean, and voila!


A sugary pumpkin patch!


Or take some classic rice krispie treats, dip them in some white chocolate, add some adorable eye candies, and you have ghosts!


And just some Halloween sprinkles for a little splash of color!


Shout out to my roomie, Lauren,  who ran these to people houses while I waited in the get-away car. Even with a close call and a chase, it was still a fun-filled and successful night. However, I've decided that I need a less recognizable vehicle. Oh well. I'm sure that the secret would have come out eventually!

Sunday, October 30, 2011

Another one bites the dust... or the cake.

I had another one of my room-mates get married at the beginning of the month. She looked gorgeous and so happy. Her wedding was simple and elegant, and so the cake had to be as well. I was very excited for the opportunity to work on some of my skills!

The cake was chocolate with a nutella ganache and white buttercream icing. Top it off with some ribbons and orchids, and you have understated elegance, that tasted pretty dang good! I used the faux fondant finish with crusting buttercream again, and I have to say, I think it worked out pretty well!


Pretty classy looking!

Check out that smooth, smooth surface.

This was a very classic wedding cake. It wasn't over the top or trying to make a crazy statement. I think the statement it made was simple elegance. Which suited the bride perfectly!

Thursday, September 29, 2011

Banana Blueberry Lemon muffins? Yes please!

Guess who went to the farmers' market? THIS GIRL! And I bought blueberries! Fresh, delicious, perfectly blue (well, they are actually more of a purple), blueberries! So I had to find a fantastic recipe for blueberry muffins (my favorite muffin!)
Fresh BC blueberries. Nothing better!
And I found this one. A recipe for Banana Blueberry Lemon muffins. I do like banana, but I don't like overpowering banana. I also like lemon, but again, not an overpowering lemon flavor. These were perfect! The batch made 12, and I have been enjoying them for breakfast. I tend to pop them in the microwave for 15 seconds which releases an amazing fruity smell, then melt a little butter on them... YUM! I want one now!
Muffins! with the fancy pull wrappers and everything!
Here is the recipe, in case you don't want to click on the above link!

Ingredients:

2 1/4 C. flour
2 tsp. baking powder
1/2 tsp. salt
1/2 tsp. ground cinnamon
2 large ripe bananas, mashed
2 eggs
2/3 C. brown sugar, firmly packed
1/2 C. butter, melted
1 TBsp. vanilla
1 TBsp. lemon juice
1 C. blueberries
2 TBsp. lemon zest
3 TBsp. granulated sugar

Preheat oven to 375 degrees. Combine flour, baking powder, salt, cinnamon, and 1 TBsp. of lemon zest.
Beat together bananas, eggs, brown sugar, butter, lemon juice, and vanilla until blended.
Stir in dry ingredients. Gently add blueberries. Spoon into muffin tin. (If you don't use liners ensure you lightly grease the tin!) Combine granulated sugar and remaining lemon zest. Sprinkle over top of the muffins. Bake for 25-30 minutes until golden brown.

Wednesday, September 28, 2011

Chocolate & Peanut Butter. Can there be anything better?

So good, and incredibly rich! I combined ideas from a few different recipes that I found to make these. I used a basic chocolate cupcake recipe that I have in one of my cookbooks, chopped up baker peanut butter cups and mixed them into the batter, made a cream cheese peanut butter frosting, topped them with a mini reeses' cup and then some milk chocolate shavings. Did I mention these were really really rich? Have a large glass of milk on hand if you decide to try out this recipe. It is required!


Animal print cupcake liners? YES PLEASE!


Chocolate Cupcakes:
(You can use any recipe for these or even a box but here is the recipe I used)

3/4 C. butter
3 eggs
2 C. flour
3/4 C. unsweetened cocoa powder
1 tsp. baking soda
3/4 tsp. baking powder
1/2 tsp. salt
2 C. sugar
2 tsp. vanilla
1 1/2 C. milk

1. Allow butter and eggs to stand at room temp. for 30 minutes & preheat oven to 350 degrees, mix together flour, cocoa powder, baking soda, baking powder and salt in medium bowl and set aside.
2. In a large bowl beat butter with mixer for 30 seconds and gradually add sugar until combined. Beat until light and fluffy. Add eggs, 1 at a time, beating after each addition. Beat in Vanilla.
3. Alternate adding flour mixture and milk to butter bowl. *
4. Spoon into cupcake liners (in your pan) and bake for 18-22 minutes. Allow to cool before decorating.
* after all the ingredients were mixed well I used a spatula to fold in the peanut butter cup chunks.

Peanut Butter Cream Cheese Frosting

1. Allow one 8 ounce package of cream cheese to stand for 30 minutes at room temp.
2. In large bowl beat cream cheese with 1/2 C. creamy peanut butter & 2 tsp. vanilla.
3. Gradually add 6* C. powdered sugar. Add milk 1 tsp. at a time until you reach the consistency you would like for spreading or piping the frosting.
* I did not use 6 C. of powdered sugar. I found the icing to be plenty sweet at 4 1/2!

Indulgence at it's finest!  

Saturday, September 24, 2011

Root Beer Float Cupcakes

Remember back in June when I was supposed to make Root Beer Float Cupcakes? And then remember that time that I made them and they were disgusting so I refused to even show you a picture? Well. I have found a recipe that redeems that attempt! These cupcakes were fantastic. This might sound weird but they had a spiciness to them, that wonderful spiciness that exists in root beer. 

Aren't they cute? The perfect little Root Beer Float!

Here is the recipe that I used, for all those of you who love root beer and need to try them out!

Ingredients:
1C. Root Beer Soda
1 tsp. apple cider vinegar
3/4 C. sugar
1/3 C. canola oil
1/2 tsp. vanilla extract
2 tsp. Root Beer extract (I found some through Watkins)
1 1/3 C. flour
3/4 tsp. baking soda
1/2 tsp. baking powder
pinch of salt.

Preheat over to 350 F, and line muffin tin with 12 liners.
Combine soda and vinegar and let stand for a few minutes.
Add in the sugar & oil. Whisk until slightly frothy.
Add extracts, and gently add the flour along with the baking powder, baking soda, and salt.
Do not overmix (I really have no idea what this means but it's in the directions)
Fill cupcake liners approx. 3/4 full.
Bake for 18-22 minutes.

Now the recipe I used called for a vanilla buttercream frosting. I cheated. I bought a tub of cool whip, then using my cookie scoop (I heart my cookie scope) I put a blob of cool whip on top of the cupcakes. I also used these incredibly cute stripe paper straws to add a little flair.

If you are a Root Beer fan, I highly recommend these!


Thursday, September 22, 2011

Cookies

It's no surprise that I LOVE peanut butter and chocolate (as will again be proven by some future posts), totally my vice. So when I was craving the fantastic combination last night, I just had to whip up these cookies. I'll admit, I cheated and used a Betty Crocker peanut butter cookie mix, but I love how quick they were, and oh so good! Melting chocolate, and the sweetness of a little sugar.... mouth watering right now & wishing I had thought to bring a couple to work to munch on.
Can I just say how much I love my double decker (can be triple) cooling rack!

Simplest cookies ever! 
Preheat oven to 375 F.
Follow instructions on Betty Crocker Peanut Butter cookie mix package.
Roll dough into 1 inch balls.
Coat in granulated sugar.
Place balls on parchment paper lined cookie sheet approx. 2 inches apart.
Bake for 8-10 minutes (I only baked them for 8)
While cookies are baking unwrap Hershey kisses.
Immediately after you take the cookies out of the over, place a kiss in the center of each cookie.
Allow cookies to cool & then enjoy the goodness! 

Tuesday, September 20, 2011

Strawberry Shortcake Cupcakes

These were the September cupcake on my list. And they were yummy! I love strawberry shortcake as it is, but these are the perfect size and the fact that the frosting even has strawberry flavor to it made them that much better!
cutest liners ever! however difficult to tear into, so if you use similar liners, you'll need to cut a small slice in them so you can peel it off before you enjoy!

I found the recipe for these online, again, searching the images and deciding on which ones were most visually appealing. So here it is! Make them. You won't be sorry!

Strawberry Shortcake Cupcakes
yields 12

Cupcake Ingredients:
1 C. plus 2 Tbsp. flour
2 Tbsp. cornstarch
1 1/4 tsp. baking powder
1/8 tsp. salt
3/4 C. sugar
2 large eggs at room temp.
1 1/4 pure vanilla extract
4 Tbsp. unsalted butter, melted
1/4 C. vegetable oil
1/2 C. milk at room temp.

1. Preheat the oven to 350.
2. Whisk flour, cornstarch, baking powder and salt in a small bowl.
3. In a large bowl, beat sugar, eggs, & vanilla on medium high with electric mixer until smooth and thickened slightly. (approx. 3 min.) Add butter & oil; beat until incorporated. 
4. Add dry ingredients and milk in 3 alternating batches, beating between additions. 
5. Fill liners 2/3 full & bake for 20-23 minutes.

Frosting Ingredients:
6 Tbsp. unsalted butter, softened
2 C. powdered sugar, sifted
1/2 tsp. pure vanilla extract
pinch of salt
2 Tbsp. milk
strawberry jam

1. Beat butter until smooth.
2. Add icing sugar, vanilla, & salt. Beat on low until combined.
3. Increase mixer speed to medium and mix until smooth. Add milk & beat until light and fluffy. 
(approx. 2 min.)
4. Mix the frosting with strawberry jam (to taste)
5. Frost cupcakes, then top with fresh strawberries

Yum!

Monday, September 19, 2011

Chocolate Nutella Cookies

Wow. I've been neglecting my blog! It's a sad thing, because it means not as much baking has been occurring. I had kind of a hectic August however, so I really didn't have time to bake. But I've made up for it in September! So check back over the next few days to see what I've been up to. I'm also doing another wedding cake in October so that is very exciting!

I made chocolate nutella cookies the other day and they were yummy! I didn't take any pictures, because they really aren't that much to look at, but here is the recipe. I found it at Our Best Bites. Great website. Look it up and be inspired in your culinary masterpieces. Simple and delicious!

1 1/4 cups all-purpose flour, lightly spooned into measuring cups and leveled with a knife
1 teaspoon baking powder
1/2 teaspoon salt (omit if using salted butter)
2/3 cup Dutch-process unsweetened cocoa powder
1/2 cup (1 stick) butter
1/2 cup sugar
1/2 cup dark brown sugar
1 1/2 teaspoons vanilla
1/2 teaspoon hazelnut extract (you can substitute 1/2 teaspoon vanilla if you can’t find or don’t like hazelnut extract)
1/3 cup Nutella*
1/3 cup milk

Instructions:

Preheat oven to 325°

In a small mixing bowl, whisk together the flour, cocoa powder, and baking powder. Set aside. In a large bowl, beat together the butter, granulated sugar, and brown sugar with an electric mixer on medium speed  until smooth. Add the extracts and beat for another 30 seconds. Add the Nutella and beat until smooth.

With the mixer running, add half of the flour mixture and mix until combined. Add the milk, mixing until combined completely, then add the remaining flour mixture and mix completely. Cover and refrigerate the dough for at least 15 minutes (and as long as 2-3 days). I would leave it longer than 15 minutes because I still found the dough to be a little sticky.

Line a baking sheet with parchment paper or sil-pat. Roll tablespoons of dough into balls and place them on the lined cookie sheet, 2" apart
Lightly press the dough balls and  bake for 10-12 minutes or until the cookies are crackly on top and soft, but starting to set. Remove from the oven and allow them to stand for about 5 minutes and then transfer the cookies to a cooling rack and allow them to cool completely. Makes about 3 dozen cookies.

* I want to try again with a little more nutella to make them a little more nutella-y. Or maybe spread a little nutella on one and top it with another cookie, to make little chocolate nutella sandwiches. Yum!
 
But there it is. Again, sorry for no pictures. Just picture in your mind small round brown cookies that are quite flat, and you really have no need for a picture! Have fun baking! And don't forget to check back over the next week, 3 cupcake flavors are going to be posted!

Sunday, July 31, 2011

If you like Pina Coladas....


My cupcake list for the year is half done! If you noticed, June was supposed to be Root Beer Float cupcakes. Sadly, June did not allow me to make them. I was just too busy! I tried to make them and my July cupcakes in one day. Needless to say, sometimes recipes just aren't as good as they sound! So I will attempt the Root Beer Float cupcakes again with a different recipe. For now please enjoy these beautiful Pina Colada cupcakes. They were so yummy! I'm not the biggest fan of coconut, but the coconut is what really brought these cupcakes together!


And what is a Pina Colada without and umbrella & straw?


Pina Colada Cupcakes:

1 yellow cake mix
1/3 C. canola oil
1/4 C. water
1 tsp. artificial rum extract
1 can crushed pineapple (undrained)
3 eggs


Preheat oven to 350.
Combine cake mix, oil, water, rum extract, pineapple with juice, and eggs.
Beat on low for 30 seconds then on medium speed for 2 minutes.
Bake for 13-20 minutes.


Frosting

1 can of whipped vanilla frosting
1 tsp. coconut extract
1 tsp. artificial rum extract
1 C. shredded coconut

Add extracts to frosting and blend well.
Sprinkle with coconut. ( I actually toasted the coconut a
little first to give it a little color to stand out on the frosting)

Store covered at room temperature.

Enjoy! : )

Monday, July 25, 2011

Icing Roses

I made icing roses for the first time this past weekend. I was very happy with the result! I came across a little stress when I originally wanted to use a buttercream icing and the recipe I was using was not holding shape at all! It melted into a nasty little icing blob. So I decided to save some stress of attempting another buttercream icing and having the same issue by using royal icing. Royal icing is icing sugar, meringue powder, and a little bit of water. It is most often used as a glue when baking and also the icing of choice when flooding cookies. Royal icing is quite stiff and so by the end of my adventure with the roses, my wrist and forearm were killing me! But the results made up for the pain!
 The only other issue with using royal icing is that it dries rock hard. Still edible, but hard. I figure though, at times you need to give up on some aspects of what you were hoping for if you want the end result you desire. Visually these flowers were what I wanted them to be, and I accepted that.

I also did a basketweave application of buttercream icing that I had never done before. It made the cake look like a basket of flowers, which I though would be appropriate since this was a birthday cake for someone turning 90. When I was practicing the basketweave it looked like shredded wheat and it still does a little on the cake itself as well, but I was quite happy with the end result. The leaves were then piped in using the largest leaf icing tip I had to fill in the spaces and to actually make it look more like a basket of flowers. I personally think the cake turned out super cute. I hope it tasted as good as it looked! I have still yet to hear the verdict on that one...
I had also been commissioned to make 48 cupcakes to go along with the cake, since they only wanted a small cake. I was given free creative power over everything pretty much, the only thing was that they wanted flowers, and the cake had to be lemon. The cupcakes were chocolate and vanilla with buttercream frosting. Using rolled fondant (I love the Satin ice brand. It actually tastes good. Someday I'll get adventurous and make my own, but for now this works for me!), I cut out little flowers in white and pink, and put a pale pink sugar pearl at the center of each flower. I think they just added a little something to the cupcake. I also put the flower off center to give it a little more cuteness.

I had a lot of fun making these. Mainly because it gave me a chance to learn some new skills. I love being able to develop my abilities so that I can continue to do what I love doing.

Tuesday, June 28, 2011

36 Years.

My parents have been married for 36 years. Wow. I'm in awe, especially when in our society marriages don't even seem to last 5 years. I love my parents so much and I am so thankful for their amazing example. And of course, as always to celebrate a momentous occasion, I made cake. I made a white chocolate raspberry cake. Yum. The recipe can be found on the Kraft website. Also, my mom loves bears, so I figured I'd make a cute little topper for the cake. Please focus on the topper more than anything. Don't pay attention to the piping or the icing job. Just look at the cute little bears!


I made the bears out of fondant, and I'm really happy with how they turned out, especially on a first try! I'm excited to try all sorts of new little fondant figurines now. I think a giraffe would be super cute... Now to find someone who needs a giraffe cake!


 Happy Anniversary Mom & Dad! Love you lots! 
And thanks again for such an amazing example of a wonderful marriage!

Sunday, June 19, 2011

Happy Fathers' Day!

So, instead of cake, I made my, Mr. Fix-It, Dad cookies. I think they turned out pretty good. I played a little with the color when I was editing the photos, but they are still very close to the actual color.


so I need to work on my piping a little, but my flooding is getting better!
Happy Fathers' Day Dad! Thanks for everything you do and for fixing anything and everything that I need! And thank you for instilling a determination and willingness to try to do new things and figure out how to do them, and not taking short cuts, but doing it right. : ) Love you lots!

Cake Wrecks

I have discovered the most spectacular blog ever. Cake Wrecks. That's right. Hours of entertainment. A friend of mine is moving away, and since she and I enjoyed Cake Wrecks together on many occasions, I made her, her very own cake wreck. Every part of her cake came from this site, so you really need to go and look at it!

Bad spelling, Poor use of punctuation, the mistake then fixed, horrible following of instructions.... Poo border. I could go on and on!

just look at the balloons... yes those are supposed to be balloons.

carrot jockeys... quite possibly the most bizarre thing I've ever seen on a cake

little Kyle doing Tae Kwon Do.... just let the image sink in

I had so much fun making this 'on purpose' cake wreck, I may have to make more! Some of my favorites  are some of the Christmas cakes. Seriously, if you haven't clicked on the link yet, do it now. In fact here it is again! Cake Wrecks. Your life will never be the same.

Wednesday, June 8, 2011

Berry Fresh! Tastes like summer!

I made these cupcakes in May for a birthday party. They were fresh and light and perfect to get me feeling like summer! Too bad we've had roughly 3 weeks of pure rain which have since removed all summer feelings from me.

Here they are Lemon cupcakes filled with fresh raspberry and icing puree. So yummy! I purchased a 'Betty Crockers Best Cupcakes recipe book', and these little beauties were in there. So many amazing cupcake recipes that I need to try, and for those of you who think, I don't want to make cupcakes from scratch! It just seems like too much work, then these recipes are for you! They all use cake mixes with other things added to them. For example, this particular recipe called for a white cake mix and to make it lemon, you just mix in lemon zest. Also, the icing was the tubs of Betty Crocker pre-made stuff, again just adding things to it. So easy, and incredibly tasty!


Nothing better than biting into a cupcake and being surprised with raspberry goodness.

Friday, June 3, 2011

By Popular Demand.

So I guess I can't just get away with posting some pictures of some delectable treats. I've had many requests for the Cookies N' Cream cupcakes that I posted..... YESTERDAY. Apparently people do read my blog. It's always nice to know!

Here is the recipe I used. I found it at Annie's Eats. This website is amazing. So many different things I want to try. Not just the yummy looking treats. For simplicity, instead of making you search through the entire site (even though you really should) here is the recipe I used, as she actually has 2 different Cookies N' Cream cupcake recipes on the site.

Cookies N'Cream Cupcakes

Yield: 24 cupcakes


For the cupcakes:

24 Oreo halves, with cream filling attached
2¼ cups all-purpose flour
1 tsp. baking powder
½ tsp. salt
8 tbsp. unsalted butter, at room temperature
1 2/3 cup sugar
3 large egg whites, at room temperature
2 tsp. vanilla extract
1 cup milk
20 Oreo cookies, coarsely chopped (I quarter them)

For the frosting:

8 oz. cream cheese, at room temperature
6 tbsp. unsalted butter, at room temperature
1 tbsp. vanilla extract
4 cups confectioners’ sugar, sifted
2 tbsp. heavy cream

For garnish:

Oreo cookie crumbs
24 Oreo cookie halves

Directions:

Preheat the oven to 350˚ F. Line the wells of two cupcake pans with 24 paper liners. Place an Oreo halve in the bottom of each liner, cream side up. In a medium bowl, combine the flour, baking powder and salt; stir together with a fork to blend and set aside. In the bowl of an electric mixer, combine the butter and sugar and beat together on medium-high speed until light and fluffy, about 2 minutes. Blend in the egg whites one at a time, beating well after each addition. Blend in the vanilla extract. With the mixer on low speed, beat in half of the dry ingredients just until incorporated. Add the milk and beat just until combined, then mix in the remaining dry ingredients. Gently fold in the chopped Oreos with a rubber spatula until evenly incorporated, being careful not to over-mix.

Evenly divide the batter between the prepared cupcake liners. Bake for 18-20 minutes, rotating the pans halfway through baking, until a toothpick inserted in the center comes out clean. Allow to cool in the pans 5-10 minutes, then transfer to a wire rack to cool completely.

To make the frosting, combine the cream cheese and butter in the bowl of an electric mixer and beat on medium-high speed until smooth, about 1 minute. Blend in the vanilla extract. Beat in the confectioners’ sugar until incorporated and smooth, 1-2 minutes. Add the heavy cream to the bowl and beat on medium-low speed just until incorporated, then increase the speed to medium-high and whip for 4 minutes until light and fluffy, scraping down the sides of the bowl as needed.

Frost the cooled cupcakes as desired. Sprinkle with Oreo crumbs and garnish with Oreo halves.

So there you go. Isn't technology amazing? I find it so fascinating that I can locate all these wonderful recipes by the clicking of a few buttons.


Wednesday, June 1, 2011

Cookies N' Cream

I love scouring the internet for new ideas and recipes, and when I found this one I knew I had to try it. I really don't believe that much explanation is required. I'll just let the pictures entice you!
Yum!


And yes, that is half an Oreo including the cream filling at the bottom of that cupcake. Delicious. I think what really did it for me on these was the cream cheese icing. Seriously good.

Sunday, May 8, 2011

Happy Mothers' Day!

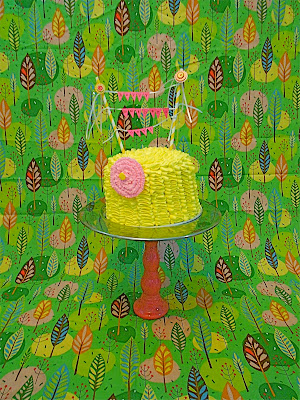
I came across an incredibly cute cake the other day in my random blog searches. I looked at it and thought, 'I can do that'. So I did. And added my own little twist. 
One word. Ruffles. 
And who better to make a ridiculously cute ruffled cake for than my Mom. The cake in honor of Mothers' Day and to all the women in my life who have been Moms' to me. But especially for my Mom who is the person who will actually get to eat this little beauty. 


(I also got a new camera... can you tell I had fun editing the photos?)


cute fabric background too, huh? I'm kind of in love with it.

The cake was a white cake with a pink tinted buttercream icing in between the layers, then covered in a yellow tinted buttercream. The pink ruffle flower is also buttercream that I froze to get it hard enough to attach a little ways up the front of the cake with its' center being a large circle sprinkle (for lack of better word). The ruffle was incredibly easy to make using a petal icing tip. Sadly, I delivered the cake to my Mom and the flower kind of fell down the cake, but at least I got pictures prior to! And now I know... Add buttercream embellishments on site!

So there it is. 
A cute ruffle cake for my Mom. 
Happy Mothers' Day Mom. Love you lots! 
And thank you for instilling a craftiness in me that has kind of overtaken my life
 and allows me to feed my perfectionist personality! : )

Monday, May 2, 2011

Wedding Cake #5

When I first made my friend Chrissy's wedding cake, I never would have dreamed that I would continue making other wedding cakes. But here it is #5!

A friend from high school recently contacted me asking if I would be willing and able to make her wedding cake. I'm all over getting some more practice in, because really, deep down, this is what I would love to do with my life (however without formal training it's quite difficult, so I'll take what I can!). 

It started the same way that I've started any wedding cake (or cake for that matter) with lots of questions. What flavor? Do you like fondant? Color scheme? Do you have pictures of what you are thinking of? etc. She sent on a few different pictures pointing out what she liked from each cake. At first, I will admit I was a little skeptical about what this cake was going to look like. It had quite a few different elements going on that I wasn't sure how they would blend together.

Here is the general idea of what the cake was going to look like. The top tier and the bottom tier were going to have the same pattern on them, preferably swirls or the like. The middle tier was going to be covered in vertical stripes. The 3 tiers were all going to be different heights as well, with the middle tier being the tallest. The cake was going to be covered in a faux fondant finish (so smooth buttercream) in white, with the patterns being white as well. There was to be green ribbon on it, and I don't even know how to describe it, other than to look like a present. However, once you see the pictures you'll know that is the worst description ever. At the corner where the ribbon intersected the bride had asked for some bling. As for a cake topper, it was going to be a be-dazzled 'D', which the bride was responsible for finding. The cake also had to serve 60 people.

Now typically wedding cake slices are quite small, yet the bride asked that the cake be able to cut larger and still provide enough for 60 people, since her family was a big fan of sweets. The sizes that I chose ended up being, 5 inch top tier, 7 inch middle tier, and 10 inch bottom tier. With the height of the tiers, this cake could serve up to 115 people with the typical wedding cake slice.

A week before the wedding, the bride contacted me saying now the cake had to serve 80, and I assured her, that there would be plenty of cake, as well, the cake topper was now some flowers and giant rhinestones that her sister was providing, and they would be waiting at the venue for me to place on the cake. So now I had a patterned white on white cake, with green ribbon doing a criss-cross thing, bling, and some flowers on top. Again, I was getting worried about what this cake was going to look like when it was all done.

I was pleasantly surprised and proud of this cake when it was all done. Despite some trials along the way, including my sister sitting in the back watching the cake (we had stacked it before we left the house for the venue) making pained noises and small cries of worry everytime we hit the tiniest bump. Love you Mandy!

So here are the long awaited pictures after my ramble.... I hope you like them!

The middle tier
Close up 

                             
Yummy Layers

Finished product

Sorry for the weird long row of pictures. I couldn't figure out how to make them side by side! : )

And I will say the best part of making a wedding cake, 
is having the bride love it.... 
and she did!