Tuesday, October 7, 2014

Cow Pies!


I'm involved in the leadership of my church youth group. (Should you like to learn more about my church -The Church of Jesus Christ of Latter-Day Saints- click here).

There is a really old church movie called Johnny Lingo. Now I believe they remade it, but the old one is classic. We watched it this evening as Young Women. Then the girls had tasks to achieve to help them maintain their "8 Cow" status. (These girls are already worth that and more! I just love them!)

I was in charge of the activity and had 8 tasks all ready for them to do with other leaders assisting with them. I was in charge of the cow pies.

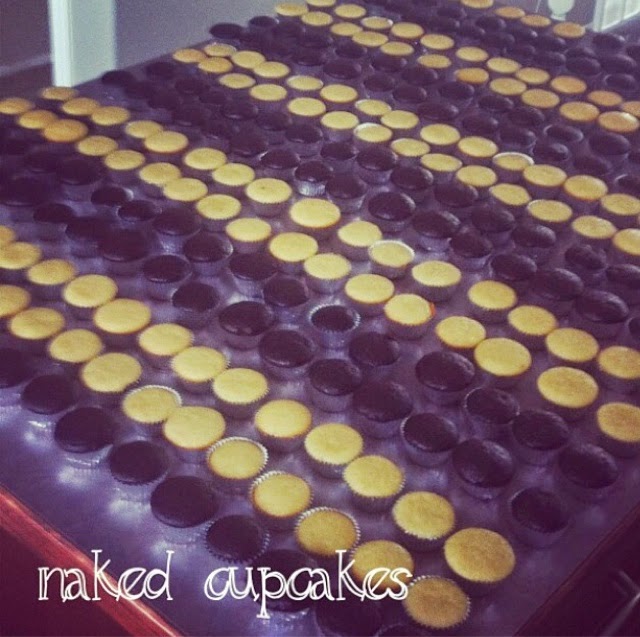
Now before you get nervous, it had nothing to do with real cow pies... Well except they did start off brown since I used chocolate cupcakes. ; ) 

I just used a boxed mix and store bought icing (fluffy white & chocolate; the chocolate was tinted with black icing coloring).

But here is a quick photo step by step tutorial of how these  "cow pies" turned into cute little cows. 

Items needed:

Cupcakes
Icing (white and black)
Marshmallows (sliced thin)
Pink chocolate wafers
Chocolate covered raisins
'Eye' sprinkles (or just use black icing)

Here we go!
 (We can have lots of fun! - 10 points to whoever gets that reference.... I just couldn't help singing it while decorating.)

Just frost some white icing onto a cupcake. It doesn't have to be perfect!


I cut marshmallows into thin slices to use as the cow muzzle. I put the sticky side down. 


Did you know there are cute little eye sprinkles?? Well there are! Add 2!


A couple chocolate covered raisins make some pretty fantastic little ears.


A pink chocolate wafer attached with a little pipes icing to the marshmallow makes the nose.


Pipe some black icing (I use chocolate then add black icing gel coloring) to get spots and nostrils. And voila! Cutest little cow ever!

Kinda hoping someone wants a farm themed kids party at some point so I can try out some more animals, and a barn! So friends.... Anyone???? 

: )


Thursday, September 25, 2014

S'mores Pie


So, want to make the most decadent chocolate pie ever?!?!? 

Then make this S'mores pie! It was so rich and delicious. The recipe says it feeds 6-8 but I would actually go with 10-12 due to how rich it is and the sweet sugary goodness of the marshmallows on top!

The recipe comes from The Pastry Affair. It was incredibly easy to make, and I even managed to not start a fire in my oven while toasting the mashmallows!

Ingredients

2 Cups Graham cracker crumbs
8 TBsp unsalted butter, melted

3/4 Cups heavy cream
3/4 Cups milk
10 ounces semi-sweet chocolate, chopped
Pinch of salt
2 eggs, whisked

1 bag of large marshmallows

Preheat the oven to 325 degrees. Make the crust by mixing together the graham crackers and the melted butter. Press into a 9 inch pie pan. Bake for 8-10 minutes.

In a medium saucepan heat the cream and milk. Whisk it lots to keep it from burning and keep the heat at a medium temperature. Once it is heated through add the chocolate and pinch of salt. Whisk until smooth. Slowly add the whisked eggs and it will thicken. Pour onto the crust and bake for 15-20 minutes, or until the chocolate filling does not move when shaken slightly. Remove from oven. 

Cut the marshmallows in half and place on top of pie. With broiler on low and oven rack low, place pie back in oven till marshmallows are a toasted brown. It will not take long so keep an eye on it!

Allow the pie to set for 2-3 hours in fridge after it cools. 

Then indulge! 

: )

Thursday, September 18, 2014

Ooey Gooey

I love Pinterest. It's not a secret. I love how so much stuff is already found for me. It saves me hours on google. Especially when I'm searching for some sweets for Girls Night! So that is where I found this amazing ooey gooey peanut buttery chocolate goodness.


This recipe comes from I Wash ... You Dry

Here is the recipe for this delicious Chocolate Peanut Butter Earthquake Cake.

Ingredients:

1 box chocolate fudge cake mix, plus ingredients needed to prepare (eggs, oil, water)
1/2 C. butter
8 Oz. cream cheese, softened
1/2 C. creamy peanut butter
1/2 tsp. vanilla extract
3 1/2 to 4 C. powdered sugar
1/2 C. chocolate chips ( I totally added more than this! The more chocolate the better in my humble opinion.)
1 C. miniture peanut butter cups (Again, I used more..... This cake is not for those on a diet!)
2 C. Reese's Pieces (not on original recipe.. this was all me!)

To make the cake!

1. Oven needs to be preheated to 350.
2. Make the chocolate cake mix according to the package and pour into your cake pan. Make sure it is lightly greased. I made my cake in 2, 9 inch rounds. However, do not put it in the over quite yet! You're about to add the ooey gooey goodness!
3. Melt your butter on the stove until it is bubbly. 
4. Combine butter and cream cheese in a mixing bowl and beat until it is smooth.
5. Add the vanilla and peanut butter and continue to beat until smooth.
6. Add your powdered sugar 1 C. at a time and continue to beat mixture until it becomes light and fluffy. 
7. Scoop big spoonfuls of your peanut butter mixture and drop them into the cake batter. Sprinkle that with chocolate chips, 3/4 of the peanut butter cups, and 1C. of the reese's pieces. 
8. Bake for 45-55 minutes. The center will still be slightly jiggly when the cake is done (again where the ooey gooey goodness comes from!)
9. Let the cake cook for 15-20 minutes. Do not remove from pan! (I learned this the hard way and only got to enjoy one of these suckers....)
10. Top with the peanut butter cups and reeses pieces that are left over! Slice and serve! 

It was so delicious and decadent. Highly, highly recommended!


It was a girls night hit!

: )

Wednesday, September 17, 2014

Wedding Cupcakes Post #1


So I'm not going to go into a lot of detail on these cupcakes. But I will say the chocolate ones were intense! Very brownie like in taste and incredibly dense and rich. Yum! I used 2 different piping techniques for the chocolate and vanilla cupcakes. The ones getting the vanilla icing were piped to look like roses. To get this effect you start your piping in the inside and work your way out. Whereas the chocolate ones, I started on the outside and went in to give them cute swirls. Add a mini Hershey kiss and they are just too cute!


Coming soon!


Stay posted this week for more info on this lovely spread I did in August. 

: )

Oops!

So I just realized that this 'little' cake never got published!

My dear friend Jill got married in June of 2013. We met my first year at college and were in the same YSA ward at church. 12 years (?) later we both are living in Lethbridge and she meets the man of her dreams. 

She asked for 300 mini cupcakes in her wedding colours of pink and green. They filled my entire island! A little army of cupcakes. 


And decorated...


And then the cake! I say 'little' because it really wasn't! The bottom tier was a 14" cake! Now, we happened to be having a very hot day the day of delivery! It was terrifying! The cake had a bit of an accident on the way there! Thankfully I was able to fix it. The cake was vanilla with vanilla buttercream and covered in a crusting buttercream. I really so like crusting buttercream because it looks nice and smooth like fondant but I find it easier to work with! Now if someone loves fondant I'll use it, or if I can't do what is requested with icing! Thankfully this couple didn't care for fondant. : )

The wedding was beautiful and they had the cutest little setup for the cake!


Now, please do not judge the ribbon looking a little wavy... Like I said it was hot, so a little melting occurred as it sat there. I was very happy with it though and hope they loved it just as much as I did. 

So congratulations Jill & David! And since I'm so late getting this up... Happy 15 month anniversary!


: )


Tuesday, September 16, 2014

Another wedding cake... From June....

Here it is! I made a wedding cake in June for a lovely couple. She's a Brit. He's not. Ha ha!

        It was nice to be able to get back into cake decorating! I'm running out of single friends though, guess I need to start doing birthdays!


        The cake was lemon with vanilla buttercream and lots of piping! That was fun. It is definitely not something I felt too secure doing but I have to say, I was quite proud of it! Especially since I don't do a lot of it. A new technique to try and perfect now. 


    So there you have it!

    Congratulations Charlotte & Tyrel!

                     : )